Friday, December 31, 2010

Look out here comes another year.

Well it is the end of a year. I think the end of a year is kind of a bit of sweet and sour. On one hand you think of all the great things that happened this year and then you have all the tiring, junky things that happened as well. I'm sure all of you have had plenty this year, maybe more junk than good. I like to look back and see the good stuff I have done. 
1. Started my blog
2. Started selling my hair clips
3. Ella turned 1 and she seems pretty happy with her imperfect mom.
4. I'm still in my house.
5. I've tried lots of different recipes this year.
6. Taught recipes to the women in my church and reaffirmed the idea that I would be a great tv cook. (because I'm basically crazy and slightly hilarious to watch when I cook)
7. I'm healthy, slightly overweight, but healthy.
8. I'm getting used to being at home without going crazy.
9. I figured out to bring ear plugs with me whenever we go on a trip, has definitely made me saner.
10. I have a wonderful family that includes a whole lot of people who I love and who love me and really that is all you need.

I suppose that is pretty good.  I haven't achieved very much financially or intellectually this year but I figure there are plenty of years for that.

I'm looking forward to next year. I see it as a clean slate that I can work with. I know I should wait till Jan. 1st to make my list but I'm anxious to get going. So here are a couple things I want to do in the coming year. 
1. Keep my house cleaner and more organized. I have a small space and I need to work with that more.
2. Look into selling hairclips and accessories at Ren fairs this year, I think that is an untapped market.
3. Work on sewing more.
4. Work on my spirituality and devote more of my time to ingesting spiritually uplifting stuff.
5. Love my husband more. I think I take him for granted too much and alot of the time I get annoyed and just want to nag him about stuff when there  is plenty of stuff wrong with me. 
6. Do more artwork. 
7. Drink more water.
8. Dejunk my life, so focus on stuff I really want to do and get rid of all the side stuff that I never really get around to but I waste energy thinking about it.
9. Stop worrying so much about money and find something that I love to work on.
10. Spend more time playing with my daughter.


I think 10 is a good number. And I tried not to pick ones that I won't really do. I taught a lesson in YWs where we talked about goals. It said you shouldn't spread yourself too thin on goals, instead devote your energy to 1 or 2 for a couple weeks. That way you will actually accomplish something. 

Have fun thinking about the new year and then spending a month getting used to writing 2011 instead of 2010. :) Love ya

Friday, December 17, 2010

Mmmm Lima bean and ham soup.


Isn't it funny how your tastes change over the years? Every year my mom would make lima bean and ham soup around christmas time and I hated it. Slowly as I got older I grew to like it and then last year after I made my first ham at home I made my own soup and Holy Cow it was amazing!
Now you may say, why do you think it was amazing. It just was. :) That and my Dad never really likes this soup but I invited them over and he ate two servings of it because he liked it so much. So here is how I make it.

Ingredients:
1/2 lb. dry lima beans
1/2 onion chopped
2 stalks celery chopped
1 ham bone
extra ham chopped up (about 2 cups, I like alot of ham)
1 Tbs. butter
Spices:(very important) garlic powder, parsley, basil, sage, and marjoram. (I use all dried in a bottle spices)

1. You can soak your beans overnight or you can do the quick gook method which is usually listed on the package of your beans. Rinse the beans and check them then put in a large pot with about 6 cups of water. Bring to a boil and boil for about 5 minutes. Cover, turn off and let sit for an hour.
2. Drain your beans and add back in 4 cups of water. Add your ham bone and cover but leave it open a crack to let the steam escape, simmer for about 3 hours.
3. In a separate pan add butter to melt then add chopped onion and celery. Stir until onion is translucent.
4. Remove ham bone and add ham from bone and extra ham. Add cooked onion and celery.
5. Cook for about 10 minutes then season. I don't do regular measurements of my seasoning I just have this sixth sense to it sooooo. I did a layer of garlic powder that lightly covered the entire surface of the soup, same with parsley and basil. Then I did about half the pot with sage and marjoram. Stir it and taste it then add what you think needs more. Usually it is parsley or garlic.
6. Let it cook for about another 10 minutes then serve.

*note: You could make this in your crockpot by soaking the beans overnight then draining them in the morning, add the water and the ham, let it cook all day on low and do the final steps about an hour before you serve it.

Bethlehem and it glows!

So last week was our Relief Society Christmas program and one of the ladies asked me to make a scene of the manger as a table display for her room. I immediately had an idea for making it stand up and have windows with lights coming through. So here is the finished piece.

I made it out of black foam board. I cut the top edges so they are curved and attached those to the back bottom to make it stand up. I used an xacto blade to cut out all the openings then I glued yellow tissue paper to the back. I added some curtains in some of the windows. Then I used pearl paint for the star light and pearl paint mixed with silver for all the buildings and the ground. I used gold for the glow on the windows and doors. To light it I cut cereal boxes so I had two columns that stand up. I lined them with aluminum foil to reflect the light and I stuck a little shelf in so I had two levels of lights. Then I bought those flameless candles and voila! We have a glowing centerpiece. It came out awesome so now I have it displayed in my home.

Monday, December 13, 2010

Great Christmas Gift ideas

Isn't he so cute! He is on the list.


Alright, so it has been a while since I blogged and suddenly we are like 2 weeks away from Christmas!! So  I wanted to do some christmas crafts but I have been super busy traveling and shopping and all that other great holiday stuff. Anyway, one of my fav blogs is doing a giveaway if you post a christmas craft on her site and now she has over 100 Christmas crafts so I thought I should just link her blog for the crafts because there is an amazing assortment.

Christmas Gift ideas

Sunday, November 28, 2010

Peach cupcakes with Brown Sugar Cream Cheese frosting


So tasty!!

Yep, so for Thanksgiving I was in charge of a dessert and corn. :) Pretty nice huh? So I have these peaches that I canned this year that are amazing and I though Mmmm peach cupcakes. So I found a recipe on another blog, Smitten Kitchen which is a really great blog so you should check it out. Her photos are pretty awesome too.  The cupcakes came out delicious, very moist, and a nice change from the usual cupcake.

Peach Cupcakes with Brown Sugar Cream Cheese frosting

Makes 24 to 28 cupcakes
3 cups cake flour(bought mine at local grocery store and yes it does make a difference)
1 1/2 teaspoons baking powder
1 1/2 teaspoons baking soda
1 teaspoon salt
Pinch of nutmeg
3/4 cup (1 1/2 sticks or 6 ounces) unsalted butter, at room temperature
3/4 cup granulated sugar
3/4 cup dark or light brown sugar, packed
2 large eggs, lightly beaten
1 teaspoon vanilla extract
1 1/2 cups (12 ounces) buttermilk, sour cream or full-fat yogurt
3 large peaches, peeled, cored, and chopped smallish or about 2 1/2 C peaches
Preheat the oven to 350°F. Line 28 muffin cups with paper liners. Pull out 3 cubes of butter and 2 packages of cream cheese to come to room temperature.
Sift together the flour, baking powder, baking soda, salt and nutmeg and set aside. Cream the butter and sugars together, beating until fluffy (if your butter isn't room temperature I like to unwrap mine and put it by the oven to warm up or put it in the microwave on defrost for 2 minutes). Add the eggs, one at a time, scraping down the sides and bottom of the bowl between each addition, and then the vanilla. Gently mix in the buttermilk, sour cream or yogurt (I used the buttermilk, I think Vanilla yogurt would be amazing). Stir in the dry ingredients and fold in the peach chunks.
Divide the batter evenly (added extra to a couple and they came out squishy) among the prepared cupcake liners. I use a 1/4 measuring cup and that works out prefect. Bake for 18 to 22 minutes, or until a tester inserted into the center of cupcakes comes out clean. Cool the cupcakes for five minutes in the tin, then turn them out onto a wire rack to cool completely. After they cool a bit I like to cover them with a dishcloth so they don't dry out while I am making my frosting.
Brown Sugar Cream Cheese Frosting
The cornstarch acts as a thickener for the frosting. Powdered sugar already has some cornstarch in it but since we are using brown sugar you have to add extra. When the frosting is really cold it will be very thick and hard to squeeze out so you might need to let it sit out for a couple minutes.
1 1/4 cups light brown sugar
1/4 cup cornstarch
1/2 cup powdered sugar
2 8-ounce packages of cream cheese, at room temperature
1/2 cup (4 ounces or 8 tablespoons) unsalted butter, at room temperature
1/2 teaspoon vanilla extract
In a small bowl, whisk together the brown sugar, cornstarch and powdered sugar. In a large bowl, beat the cream cheese and butter until fluffy. Add the sugar-cornstarch mixture and vanilla, beat until frosting is smooth and light. Chill the bowl in the refrigerator until it thickens back up a bit, about 30 minutes, then spread or dollop on cooled cupcakes.

Frosting Tip* 
To get those hershey kiss looking frosting you use a round wilton # 10 tip. I don't have a big pastry bag so I snip the end off a gallon ziploc bag and stick my tip in so it pokes out through that hole. Then I put a little tape on it to hold it in place. Now I load up my bag with frosting and I'm ready to go. The great thing is that if I don't use up the frosting I can just store it in the fridge for a bit because it is already in a ziploc bag.

Wednesday, November 17, 2010

Brussel sprouts?


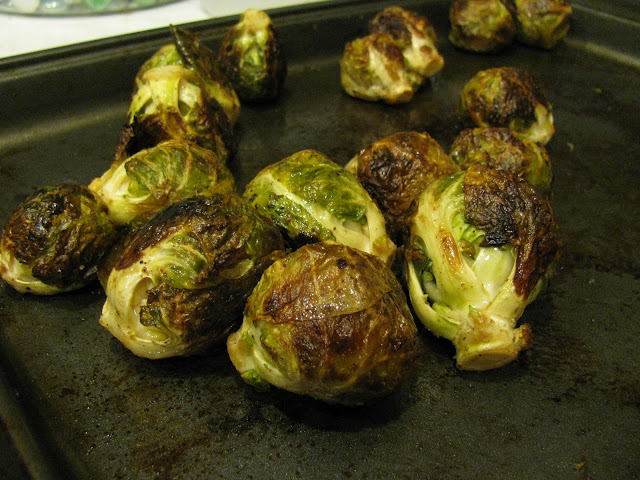
Yeeeah those look appetizing, don't they? I received brussel sprouts in my bountiful basket so I thought I would try the roasting technique since I didn't think steamed sprouts sounded that yummy. Well, guess what? They still weren't that tasty. I tossed them with olive oil and salt and pepper then roasted them in the oven for about 35 minutes at 400 degrees. They taste like cabbage, I don't know about you but cabbage isn't my favorite flavor. So I tried it and kudos to people who do like the sprouts, I salute you. :)

Tuesday, November 16, 2010

Shepherds pie!

Mmmm, had a craving for shepherds  pie the other day so here we go!

Ingredients:
1 lb ground beef
1 bag frozen mixed vegetables
1/2 chopped onion
7 potatoes
1/2 C sour cream
garlic powder
worchestershire sauce
1/2 cup beef stock or couple teaspoons beef bouillon and water.
1/2 cup ketchup
Shredded cheese, I like a cheddar and monterey mix.

Steps:
Peel and dice your potatoes. I use a pressure cooker but you can just put it in a pot of water, bring it to a boil, turn it down a little and simmer for 20 minutes. Cook you ground beef then add the chopped onion, I didn't have any fresh onion so I used some dried onion from my food storage. Drain the meat if you have too much fat. Add the vegetables and stir letting those cook for about 8 minutes. I had some cherry tomatoes that needed to be used up so I sliced those in half and added them with the vegetables.  Add a couple sprinkles of garlic powder. Add the beef stock, W sauce, and ketchup, stir this around. Turn on your oven to 350. Potatoes should be done so you can drain them, add the sour cream and a handful of shredded cheese and mash up. I like to add a little garlic powder, onion powder, and some parsley to my potatoes. I used a deep casserole dish. Fill with your meat mixture and then spoon your mashed potatoes on top. Sprinkle with some cheese and pop in the oven uncovered for 15 minutes. Pull it out when your meat mixture is bubbling along the edges. 
So delicious and it makes excellent leftovers.

Thursday, November 11, 2010

Sooooo unmotivated.


You ever feel unmotivated? I know I should be doing stuff. You've got christmas in like 6 weeks, Thanksgiving in 2, and a little flower business and really I don't feel like doing any of it. I want to do something, but nothing is appealing to me. I crocheted a roll up bag for my crochet hooks and a cell phone case for myself. I wanted to try felting, and it is very cool and I like how they came out but I didn't think other people would be very interested in them.

I guess I just don't feel excited about anything at the moment. The cold weather has finally gotten here but now I miss my fall weather. I have to bundle up because I chill so easily. I want to take a family photo of us for christmas, but that is incredibly daunting. That's the problem with being a photographer, I can photograph anything and anyone except myself. I look good in maybe 1 out of 50 shots, something to do with the angles of my face, it isn't very encouraging. I think I feel blah because of my hair. You ever have have like consecutive bad hair days? I feel like chopping it off, but then I worry because sometimes that isn't a good thing. I've started to gain the holiday weight already. The cold is keeping us from going out walking as much. Sorry, I didn't mean this to be a pity party or anything, I just figure there are other people who feel the same way and they might feel better knowing that they aren't alone in their unmotivated, fattening state. :) I love all you people. Sometimes just talking about it gets you going again so it is out there instead of in my brain. :) Alright, I'll work on something and watch some meerkat manor. Have a good evening.

Monday, November 8, 2010

Check out my online store!

Hello!!!
Well I figured it out and I am super excited. If you will look towards the top of my blog there are a couple tabs which are links to different sites, one is my new online store!! I was going to go through Etsy but it was just too much work so I figured out how to add a paypal shopping cart to a page on my blog and Voila! My online store is born. So if you wouldn't mind checking it out and giving me some feedback on what you think, what you like, don't like, and what I need to change...I would really appreciate it. Thanks!!!

Thursday, October 28, 2010

How to take food photos

So my talented sisters, Jenny and Kathy, have been making desserts and stuff and they asked for some tips on how to take photos of their food. I got all inspired as I was looking over some of my photos, I am also teaching a photo class as part of an elementary contest so I had to print out photos for those so here is goes.

1. Lighting- Natural lighting is the absolute best for shooting photos, especially food photos because you want your colors to look right. Indoor lighting usually has a yellow tinge to it, and your flash will blow all the detail out of your food. So, look around your house and outside and find a good spot for photos. I like to do them in my kitchen because in the morning the light reflects off my back wall and it makes for a soft light in the morning. In the afternoon I get full sun in the back window so it fills up my kitchen so I can take a photo not in the sun but still has enough ambient (light that is everywhere) light.

Example:
I took this photo in my kitchen and the light was not directly on them, but there was enough light in the room that I could still get the photo


 Example 2:
Notice the direct light. It is coming in through the window so I have the lines from my blinds. It also highlights my food and that gives it more contrast which can look really nice in your photo.


2. Macro setting: Most cameras have a macro setting. It is the little symbol that looks like a flower. This changes the settings on your camera so it will take photos at a closer level. Very important, when you are taking photos of food you do not have to show all of the food. Say you made 20 cupcakes, don't try to get all 20 cupcakes in the shot, arrange the cupcakes and get up close to a couple of them so that you get the detail of the cupcake and use your macro setting so it is in focus.

3. Aperature: So, you are taking a photo of your cupcake and you don't have a ton of light, that is fine. You can flip your settings to AP which is aperature priority then adjust it ( usually you have to spin a little wheel or press the circle that is your menu button) until you get to the smallest number it will go to. That is usually a 2.8. That will let the most light into your camera and then your camera should adjust the shutter speed in order for your shot to work.

Example: 3
- See my little chick. This is shot with a 2.8 aperature, notice how the chick in the background is out of focus, along with the chips? That is what happens with a low aperature it will focus on what is closest to you and the background will be fuzzy. GREAT TECHNIQUE!


4. Use your timer: nobody utilizes this feature enough. The timer is what you use when you want to get everyone in the shot. The camera takes 10-30 seconds and then goes off on its own. So, you have a photo and it is kind of dark in the room so the photo is going to take longer than 1/30 of a second to go off. Unless you have an amazing sense of control, set the camera down and use your timer. That way your shot won't come out fuzzy because you were moving. If you have a tripod that is even better, it is easier to set the camera on there and then get it positioned and use your timer. On youtube they have videos on how to make your own camera stand in case you need one and are short on funds.


5. Attention to detail: I don't do this too much because I am usually shooting at the last minute, but if you are taking photos of food, pay attention to a couple details. 1- what is in the background? Does it go with the food or is it just junk left over from baking? 2-If you have multiple of something then pick the best looking one for the photo. 3-colors, what are you serving it on? What is it sitting on? Think of textures and colors, that is what makes a professional shot. This can be shown by my example 1 and example 2 photos. Example 1, I had a low aperature so my background came out fuzzy but it still looks kind of junky, not super clean and professional. Example 2- Better, I kept with just blacks and whites so it looks more professional.

Ok- have fun with it. If you do any good ones, let me know. I would love to post some photos from other people on this section.

Tuesday, October 26, 2010

Biscuits!

Ok, I don't know about the rest of you but I have never made my own biscuits before. I've just always bought the ones in the can that pop out and scare you. So on Sunday I made chicken soup and I thought, Oooo soup with biscuits sounds good. So I made biscuits on Monday and I was pretty impressed with how they came out. So here you go!

Ingredients:

2 C flour
4 tsp. Baking powder
3 tsp. Sugar
1/2 tsp. Salt
1/2 C butter or shortening
1 egg
2/3 C milk

Steps:
I used my food processor for this so I put all my dry ingredients into the bowl. I tried using half shortening and half butter but I think it would be better with all butter, but make sure it isn't warm and squishy because you want your mix to be crumby. So add slices of your butter into the dry ingredients then pulse it or use a fork to mix it in until it is a nice crumby texture.


Beat your egg with your milk and slowly add it to your mix, I like to use a fork to mix it while I pour.


Plop your dough out onto a floured surface. Don't go crazy on the flour. I think I put a little too much flour on mine. Knead your dough about 20 times. So that means, push down into the dough with both hands then kind of roll it back in, that counts as 1. Do that 20 times.


Now press your dough out and you can roll it a little with a rolling pin but you want it really thick. 3/4 inch is good, if you need, go get a ruler. Part of mine was like 1/2 inch and part was 3/4 inch. The 3/4 came out bigger and fluffier. Also, turn on your oven to 400 degrees.

Some fancy people have a biscuit cutter. I don't. So I used a glass that was about 2 1/2 inches wide, I dipped it in some flour and that worked great.


Place your biscuits on a greased cookie sheet. I had this cool sil mat so I didn't have to grease my pan. Once you cut all your circles out, you can roll up the dough, squish it a little then flatten it out again and cut out some more circles.

Alright, so pop those suckers in the oven and time it for 10 minutes. Check them to see if they are getting a little golden, don't cook them too long!


I like mine with butter and honey. Mmmmm


Saturday, October 16, 2010

New Flower design


I probably need to take a photo of this in my hair so you can see the ratio. These are my new large flowers. They are about the size of your hand if you cup it a little. I did a series of these to sell at the  hair salon that I have moved over to. I am super excited about the move. The other salon was a good starting point so I could figure stuff out but the new salon I have them in is established with a huge clientele so it has great foot traffic. This way I get to concentrate on a smaller number of flowers that are unique, instead of mass produced quantities that were way to hard to keep up with.

So if you are in Las Vegas and want to take a look or possibly buy one, they are at Cariloe hair salon that is on S. Eastern just a little north of pebble rd on the west side of the street. It is a beautiful salon and extremely up to date on all the newest hair styles so I love going there anyway.

Wednesday, October 6, 2010

Fix a hole

So yeah, probably a year ago I noticed a hole in Warren's shirt that looked like a cut with some scissors so I went out and bought this fusible interfacing and then stuck it somewhere and couldn't find it. Well a couple weeks ago Eleanor got a hold on some scissors and she cut a hole in two of her best shirts....Great. Luckily I found my packet of interfacing so I decided to pull that out and fix them today. I thought I would put it on here because some people don't know how to do this or that they even have that option.

Ok, so if you have a hole in some clothing and it is a smooth cut where the fabric can be matched up again, instead of sewing it or throwing it away you just need to buy some interfacing, which you can find at your nearest fabric store.
Steps:
1. Put the shirt inside out.
2. Cut a piece of interfacing to fit over the cut with a little extra.


3. Place the side of the interfacing that has the little dots on it against the fabric.
4. Cover the area with a damp cloth. I like to use a handkerchief or a thin dish towel because it is thin so the heat will go through it well.
5. Place a hot iron over the area and leave for 10-15 seconds.
6. All done!

It is super easy, I was able to fix all three shirts in like 6 minutes, it was awesome.

Easy chicken pot pie

Hoo Yah Baby!! Doesn't that look good?

Alright so I have been making an effort to cook stuff that I can eat a couple nights in a row just kind of remade so it isn't really leftovers. So Monday I made potato soup, pretty easy if you haven't done it before. Quick steps:
1. peel and chop potatoes put in large pot, cover with water, bring to a boil then cover and simmer for about 20 minutes.
2. Chop one onion and some celery, put in saute pan with a little butter and saute until celery is soft.
3. drain potatoes, reserve water in a bowl and add celery and onion to potatoes.
4. Make a rue which is melting 2-3 tablespoons of butter then whisking in equal amount of flour then gradually adding milk while whisking, let it thicken and add more milk. Continue this until you get a good amount to go with your potatoes.
5. Add rue to potatoes, stir it in let that cook, if you need more liquid I add the water from the potatoes. Then I season with garlic powder, parsley, salt and pepper.


So we had potato soup on Monday night with some mixed vegetables. Tuesday I picked up a rotisserie chicken and chopped up the breast meat, put it in a bowl with my left over mixed vegetables, some potato soup and a can of cream of chicken soup. Stirred this all together and put it into 3 individual serving dishes. I bought frozen puff pastry from trader joes a long time ago so I pulled that out of the freezer, let it sit at room temperature for 10 minutes then used a pizza cutter to cut out circles that were a little bigger than my ramekin. The one in front I just placed the dough on top, the one in back I pushed it down, so don't push it down otherwise it comes out kind of flat. So we ate those for dinner and they were amazing! Tasted just like marie callender's pot pies. I had leftover dough so I brushed the top with an egg wash and put a table spoon of jam inside. we ate those before I could take a picture of them because they were so tasty.

Thursday, September 30, 2010

Sweet Potato Fries

Ahh Sweet potatoes. They conjure up images of casseroles dishes brimming with marshmallows, syrup, and chunks of orange. I was never a fan. I tried them a couple times and each time I vowed to never do it again. Then I had Eleanor and fed plain smashed ones to her and she loved them. I tried them and they were pretty yummy. So now she won't eat the mashed ones but they are a powerhouse vitamin packed spud so I tried making sweet potato fries and boy they are so good that Warren and I eat some too. 

They are super easy and you can get them year round so they have become a great side dish in my house that also reheat well.

First, get a 2-3 medium size sweet potatoes( we'll refer to them as SW so I don't have to keep typing them) Make sure they don't have any bruises, mold, or are beat up because if part of the SW is bad the whole thing will be bitter.
Turn your oven on to 375. Use a regular peeler to peel your SW and then chop off the ends.


Cut the SW into large chunky fry size. Warren thought I cut up a bunch of carrots. Try to keep them an even size because if you have a bunch of sizes they won't cook evenly.


 Place your SW into a ziploc bag and add about 1/4 C oil, I like to use olive oil. Mix that around inside and then sprinkle in some sugar and cinnamon. You really only need like an 1/8 C because the SW are already sweet this just adds a little more flavor.


 Line a baking sheet with foil and spray it with some cooking spray then spread your SW inside. Try to even it out so there isn't just a mound of fries in the middle. 

Check them at 40 minutes. I pulled these out a little soon, they taste better when the tips are a little brown, it gives it a little carmelizing affect. And there you go. Serve them fast because they cool off pretty quick, but you can just pop them in the microwave for 20 seconds and they are great.

*Note: These are not like potato fries. They are still very soft so don't expect that crispy potato fry, but they are delicious and nutritious. So Try it out!

Sunday, September 26, 2010

Well Hello again!

Gosh it has been a while!

I have been so busy getting my flowers done that I haven't been able to do anything with my blog and it is starting to bug me, so here it is! I will just do a couple things today because I don't really want to wait for the proper day to post them.

Ok, First thing...Have you guys heard of Bountiful Baskets? My Relief Society President gave me a bag full of plums and said she got it from them so I looked them up on the internet and Hurray! They are here in Las Vegas now. So It is a food co op. You pay 15.00 and get like 25.00 or more worth of produce. You just have to sign up on your day and then go on saturday to your location, bring your own basket or cooler and you get a ton of produce! They also have bread and specials on seasonal stuff. So here is my basket. I also love it because it forces you to eat stuff that you don't normally buy so it made us healthier this week.


There is more stuff underneath. I got:
7 crisp gala apples
2 large bags of grapes, one green and one black which tasted like grape jelly
1 carton mushrooms
9 bananas
6 pears
2 acorn squash
2 head of broccoli
1 large lettuce
1 large honeydew
2 tomatoes
2 cucumbers

Cool huh? I was super excited. I am going to do it again this weekend. Oh for you people in vegas, Sunflower Market has their Utah peaches on sale for 57 cents a pound and they are delicious! I bought like 10 lbs. and I made some peach jam today..


Alright, so I had to come up with what to do with my mushrooms and broccoli because I already had Broccoli in my fridge, so I found this recipe which is like a tater tot casserole that I have seen other people make but it was super yummy with broccoli.

Tasty Broccoli Casserole!!!
Ingredients:
1 large head broccoli
1 lb ground beef
1/2 carton mushrooms
1 can cream of chicken soup
2/3 C sour cream
1/2 onion chopped
1/2-1 cup shredded cheese, I use a mixed blend
package of instant potatoes and ingredients to make that.

Steps:
Start cooking the ground beef. Chop up broccoli and put in a medium size casserole dish. Remove stems from mushrooms, rinse and chop. Chop onion, add to ground beef. Drain ground beef if there is a bunch of fat. Add mushrooms, Saute until soft and getting brown. Add can of chicken soup and sour cream, mix together. Add broccoli and mix. Turn on oven to 350. Dump broccoli mix into casserole dish. Make instant potatoes according to package directions, spoon over top of broccoli mix. Sprinkle cheese over top and cover with aluminum foil. Pop in the oven and cook for 1 hour. 

This was very delicious, Ella liked the broccoli and Warren and I ate it for leftovers for a couple days because it was so tasty.

So that is what I have been up to, along with working on my flowers during all my spare time. Hope all of you are doing great, I'll try to post a couple more things this week. Have a great week!

Saturday, September 4, 2010

Fabric bracelet

Alright, so the other day I was thinking of bracelets and I came up with this design. This is my second one. I had trouble photographing it on myself, couldn't get the right angle to it so you can really see it better that and my hands have all kinds of scars and things so I might not be the best bracelet model. :)

So I made a long band of fabric that I lined with ribbon, sewed it and left a 1/4 inch border that I frayed. Then I added 3-4 button holes depending on the length of the band and the size of the buttons. Then I did the buttons on the other end. So I like the idea because you can choose how to wear it, you can leave it loose, wrap it tight, snap in all the buttons so it has movement to it, and whatever else you want. Let me know what you think, I'll try to come up with a better photo of it.

Thursday, September 2, 2010

Going to take a Break

I know, you are thinking, Well Melinda you've taken quite a lot of breaks in the past couple weeks and You are right. :) But here is what's going on.

I went and got my hair cut at a place right down the street from me and the owner loved my hair clip (the ribbon one I demo'd  before) so I am going to start selling my clips and some other stuff at their shop but that means that I need my free time to get that going cause that takes a lot of work to get together. So I don't have time for my blog and that, atleast not every day, so my blog will be kind of hit and miss the next couple weeks. I'll post some of the cool stuff I'm going to be selling in the shop and if anything else comes up that I think you guys will like, I will post that too but it won't be an every day thing until I get everything rolling. So thanks for checking in, please don't abandon me completely, I will be back. 


Love,
Melinda

Wednesday, September 1, 2010

Busy Days

My goodness it has been a busy week.


Thursday-Had to do all the doctor stuff, laid around cause I didn't feel very good.


Friday- Made crackers, posted photo and recipe, had to pack and went off to barstow.


Saturday- Hubby went 4 wheeling with his brother and sister, I went garage sale hunting and hung out with my father in law, then when hubby got back I went horse back riding with my two sister in laws, my Mother in law, and their friend. So much fun! Got back from a relaxing ride and then I tried riding a galloping horse which was awesome but hurt my back.


Sunday- hung out with the folks some more then headed home but I was sick and throwing up most of the day so I was barely doing anything once we got home.


Monday- Had to clean up the house which took like all day. Blah...


Tuesday- Did a little shopping and had to call around and get all my doctor stuff figured out.


I've also been working on crocheting a cardigan for my friend's daughter so that is taking up my quiet time..


I tried to come up with a craft for today but nothing really clicked. I went to the mall yesterday to look at all the fall looks to see if that inspired anything. Seems this fall is all about layers, solids mixed with a bit of plaids, soft scarves, glittery accessories, slumped boots, and textures


Maybe we could do something with the accessories, something that is a mix of soft and harsh with a bit of glitter, I'm thinking bracelet. Alright I will see if I can get it done, it might be more of a sewing thing for tomorrow, if you have any suggestions or ideas for things you'd like to see demo'd don't hesitate to let me know,


 I love your thoughts and suggestions. Have a great day!!!

Friday, August 27, 2010

Delicious Whole Wheat Crackers!!!


Eleanor loves to eat animal crackers and she finished up our box from costco and I thought to myself, I bet I could make something even better! So I found this recipe on allrecipes.com and I really love that site, so I tried it out this morning and they came out so incredibly delicious, I had to restrain myself from eating them before Ella even got to try them. It took about an hour to make and I did it while she was taking her nap. So if you like graham crackers or animal crackers you have to try making these because they are very easy and made from whole wheat so they are better for you.


  • 1/2 cup butter
  • 3/4 cup packed brown sugar
  • 2 teaspoons vanilla extract
  • 2 cups whole wheat flour
  • 1 cup all-purpose flour
  • 1 teaspoon baking powder
  • 1/2 teaspoon baking soda
  • 1/4 teaspoon salt
  • 1/2 cup milk
  •  

Directions

In a medium bowl, cream together the butter and brown sugar. Stir in the vanilla. Combine the whole wheat flour, all purpose flour, baking powder, baking soda and salt, stir into the creamed mixture alternately with the milk. Cover and chill dough until firm.

*Note* In place of 1 cup of wheat flour you can use 1/2 cup ground flax seed which is super good for you and 1/2 cup wheat germ. Also I chilled my dough in the freezer wrapped in plastic wrap while I got all my baking pans out, greased them, and my cookie cutters. It doesn't need to be really cold.
Preheat oven to 350 degrees F (175 degrees C). 

Grease cookie sheets. Pull your dough from the freezer and cut off about 1/3. Wrap the rest back up and put back into freezer.
 On a lightly floured surface, roll the dough out to 1/8 inch thickness (you want them really thin so they come out crispy). I then sprinkled a little cinnamon and sugar on and rolled it into the dough. Cut into rectangles.Or use cookie cutters for fun shapes. 
Place 1/2 inch apart onto the prepared cookie sheets. Put that set in the oven then pull out the dough from the fridge, cut off another third and repeat the steps above. If you try to roll out the whole thing it will be too much and they won't come out thin enough.
Bake for 10 to 12 minutes in the preheated oven, or until crisp. Edges will be golden brown. Remove from baking sheet to cool on wire racks. My pans never cook everything evenly but my browner ones still tasted delicious.


    Thursday, August 26, 2010

    No baby

    I had a miscarriage this morning. I'm doing fine, I was kind of expecting it because I've had spotting for the past two weeks and I never felt that good so I thought something was wrong. It just wasn't the right time. I cried and said good bye and it will be alright. Thanks to all my friends and family, Sorry I won't have a project today, I need a little quiet time.

    Wednesday, August 25, 2010

    Delayed craft Day

    Hey people,
    Sorry I don't have my craft day up. I just got the 3rd book in the hunger Games series by Suzanne Collins and I've been reading that, felt like total crap today, and I had to take my mom to a doctors appointment so it has been a bit hectic. Hopefully I can get it up this afternoon. If you haven't read the Hunger Games series, YOU HAVE TO!!! They are so awesome, I thoroughly enjoy them so check em out if you can. Have a great day!!

    Tuesday, August 24, 2010

    Lighting Tips #2 Night Shooting!!

    Alright!! Some of the funnest stuff you can do is to shoot night photos so here are some tips to explain why your photos come out crappy not so great and how you can change that.

    1. Everyone wants to take a photo of them in front of something at night, we have this all the time here in Las Vegas. The lights on the strip are awesome, so are all the statues and things outside the strip so you have these tourists who use their little cameras to take a photo, they get home and they have a a photo of a bunch of people in front of a black background Awwwww. You have to understand some light. Your camera is setting up for a flash photo, which is usually 1/60 at a 2.8 aperature. That is a standard for shooting with a flash, but what it is doing, is capturing just the light from the flash, not the light in the background.
    How to fix it: I tried this out with my little point and shoot camera and I tried my manual settings and my automatic settings.
     On your camera you have a little picture of a person with a moon and the eiffel tower. This is your night shooting setting, if you use this you have to hold very still because it is changing the shutter speed to a 1/8 which will capture the light in the background as well as the light from your flash, so you will have a properly exposed photo. You can do the same thing with your manual settings, but the little night setting is pretty handy.

    One more tip on this section, say you are taking a photo of something at night, like I've taken photos of hoover dam at night and you want one with you and your honey in it. Set up a tripod, and set your shutter speed to like 10 seconds and put your flash up. Put your camera on a timer, stand in the photo, once the flash goes off, run out of the photo. So the camera will only get a shot of you with the flash then it will have the rest of the time to absorb the light from your background image. It might take a couple tries, but it will look good.
    Here is my wonderful model, my husband. This is with the automatic setting on my camera.


    This is with the night setting on my camera, see how you can see more of the tree, now if I had some lights or something behind me then that would show up even better.
    2. Painting with light: A really fun thing to do is essentially painting with light. You will need a tripod to set your camera on, then you set your camera to a long shutter time like 13 seconds. Next, get a flashlight. You can use the flash light on an object or on yourself. My friend Trina did this with a creepy house at night and it made it look very spooky. Here are my examples.

    I turned the light on for a second, turned it off, moved, turned it on again so you get a ghost image. Cool huh?

    I turned on my flash light in two different areas so it lit up my bench.


    Here I did it from the bottom left corner and the bottom right corner so I got a good shadow in the background.

    And here it is with my camera set to black and white.

    Now you have a bunch of different options with this technique. You could use a warm toned flashlight and use it to draw on a building so it only catches where your light goes. You can also use this to write stuff in the air. Or you could make a creepy old looking photo of someone, you know have them laying on the ground or on a bench and then use the flashlight to highlight certain areas like their face and hands. That would be awesome!

    Baby photo idea: So say you don't want a background with your baby photo, you could set up your camera, in a dark room with your tripod, put your cute sleeping baby on something soft, like fur or a crocheted blanket, set your shutter speed to some thing like 5 seconds and try out a couple different flashlights. The LED lights are cool blue tones, while the old school bulbs are warm. Just try shining the light on just the baby from above and count how long so do it for 1 second, next shot 2 seconds, next shot 3 seconds etc. So you can look at the photos and see how much light you like on them. Also check your camera settings, if you want the photo more natural toned and you use a warm toned flashlight, find the white balance setting on your camera this is the temperature of your light, set it for tungsten(looks like a light bulb) that will tone down the warmth of the photo.  Just make sure to zoom in on the baby or move the camera close so you have at least 1/3 of the photo is the baby. You should come out with a really great photo with a very easy setup. But you have to do it when they are asleep because otherwise they will move and you will get a blurred shot.

    Alright, have fun trying this out and let me know how it goes or if you have other questions with this. It is a really fun technique that can yield surprising results. Have Fun!!